Do you want to build your own DIY miniature departure board, for your desk? Below will detail all the steps involved in constructing and setting your very own one up for as little as £60!
This project was sparked after seeing a similar concept online for train station departure boards. As a then computer science student, I decided to make my own version and now you can to! Below details the hardware you will need to purchase and how to set up and install the software I've created. Please note, this is neither owned or endorsed by Reading Buses, National Rail or any other company listed unless stated explicitly. The software is provided "as is", without warranty of any kind, expressed or implied.
* Not all regions will provide live data and data quality may vary region to region. Some regions may charge for Live data, however, Scheduled/Timetabled data is usually free in all regions.
All the hardware will cost you around £60, some of the hardware you may already own. Be sure to read the hardware list carefully so not to buy the wrong product with similar sounding names. There are two types of boards you can build, a "headered" board which will have pin headers for easy dismantling and zero soldering or there is the header-less approach which involves soldering the parts together.
£15~
First you will need a Raspberry Pi, this is a miniature computer, it will be used to power the display screen, The program has been developed and tested on a Pi Zero W; as this is also the cheapest model of Pi, I would recommend buying this one if you do not already own a Pi. If you do not want to do any soldering or want to be able to easily dismantle your final device you can buy a Pi Zero WH, which adds pin headers.
It is very important you buy the "W" version, as this stands for wireless and lets you connect to the internet.
I recommend purchasing from here for the W version or here for the Pi Zero WH version
£5-10~
If you do not already own a Micro SD card you will need to buy one to store the operating system and program files for your Pi. The minimum size is 8GB, although you can use a higher capacity micro SD card if you have one.
Make sure to buy a Micro SD card and not a standard SD card.
Most reputable brands will work fine, I personally use a samsung SD card.
£9.00~
If you do not already own a Micro USB power supply cable you will need to buy one to power up your Pi Zero W. These can once again be brought from many reputable brands. If you own an Android phone there is a chance you may already own one of these, or you might own a plug socket to USB port adapter. So long as they are for the correct voltage and amperage you might be able to use cables and plugs you already own.
I recommend purchasing from here
£23.00~
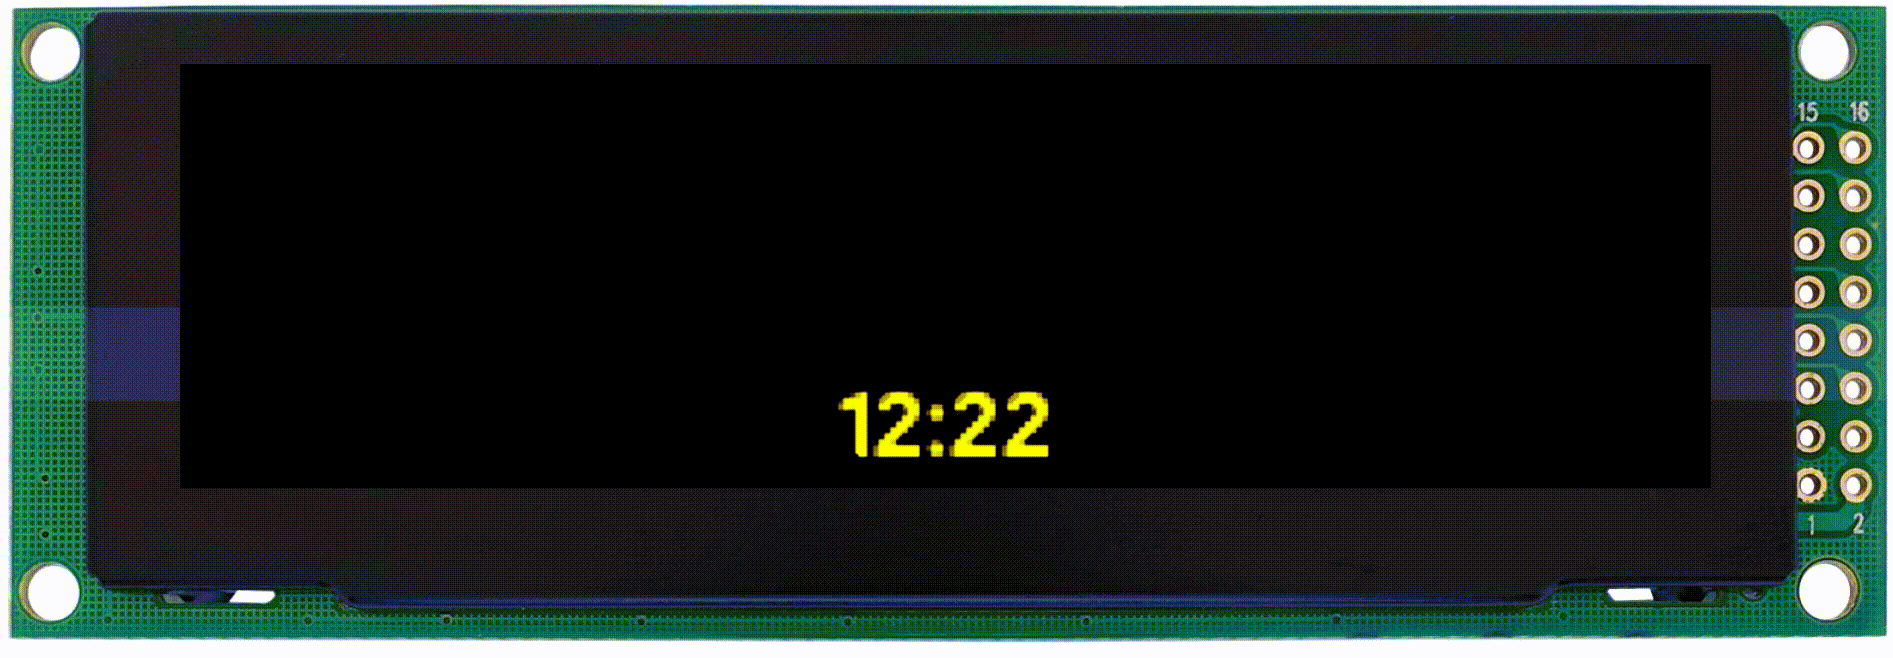
A vital part of this will be the display, the display I have tested and used is the ER-OLEDMO3D, otherwise known as the SSD1322. It is a 256X64 pixel display 3.2" in size and single coloured. The display must be shipped from China so can take a while to arrive. The best place to buy this display from is below:
Yellow Display
White Display
Cyan Display
Green Display
It is very important you buy the "4-Wire SPI" Interface display or the "Pin Header Connection-4-Wired SPI" Interface Display.
If you do not wish to solder anything or you wish to be able to easily dismantle your device once completed buy the "pin header" display - If this is the case, you will also need to buy a Pi Zero WH. Otherwise, I would recommend buying the standard 4-wire SPI interface with a standard Pi Zero W.
£2.00~
You will need to wire up your device, if you have brought the pin header version display and Pi (WH) you will need to buy "Female to Female" wire.
I recommend purchasing from here
If you have decided not to use a headered display and Pi any standared low voltage electrical wire will do.
The instructions will be split into two main stages, the setting up your Raspberry Pi and attaching the display and then downloading and installing the software needed to make the display work.
The ER-OLEDMO32 comes in a variety of interfaces, but the one you will want is either the "4-Wire SPI" Interface display or the "Pin Header Connection-4-Wired SPI" Interface Display. If you intend to use your Pi for nothing but a departure board and aren't afraid of soldering I would recommend buying the 4-Wire SPI interface. If however you wish to be able to easily dismantle your device or don't want to do much soldering buy the "Header Connection" version and a Pi Zero WH. The connections are very small so soldering is pretty difficult to achieve.
You are able to view any UK Train station (including London Underground) and any UK Bus Station! But not all regions will provide live data and data quality may vary region to region. Some bus services may charge for data after certain levels of usage.
Yes, you can! But you need some strong computer skills, the guide can be found here:
https://jonathanfoot.com/Projects/DepartureBoard/DeviceEmulator
Yes, you can! First make sure you've read our terms and conditions for usage, then head over to our guide here to implement it!
https://jonathanfoot.com/Projects/DepartureBoard/IntergratingANewAPI
Sure! You can pop me an email or post it onto Github, make sure to check out our road map first to see if it is already planned!
Your display should automatically update if left running for 3 consecutive days, if your display does not automatically update you can connect to your display via Putty (as described in the setting up instructions) . Then type the following command:
git -C ./Bus-Departure-Board/ pull
We have dropped support for Python 2 and the old scripts have been removed from the Git repository; Please use Python 3 only.
Yes this will work on any Raspberry Pi that can connect to the internet, including the new Raspberry Pi Zero 2. You'll see slightly smoother animations on the newer Pis, although the original Pi's are still sufficient.
FACEBOOK COMMENTS WILL BE SHOWN ONLY WHEN YOUR SITE IS ONLINE